Posts

Showing posts with the label Arduino

Introduction to Arduino Development Boards

Image
Arduino development boards are versatile and user-friendly platforms designed to facilitate the creation of interactive and innovative electronic projects. These boards are widely popular among hobbyists, students, and professionals due to their ease of use, flexibility, and extensive community support. Whether you're a beginner in electronics or an experienced maker, Arduino development boards offer a seamless entry into the world of embedded systems and programming.     Key Features and Components Arduino development boards come equipped with various features and components that make them ideal for a wide range of projects: Microcontroller: At the heart of every Arduino board is a microcontroller, typically from the Atmel AVR family. This microcontroller acts as the brain of the board, executing the code you write to control external components. Digital and Analog Pins: Arduino boards have multiple digital and analog input/output pins that allow you to connect various sens...

Arduino Tutorial: Interface Arduino Pro Mini and Ultrasonic Sensor

Image
The Arduino Pro Mini is a compact, versatile microcontroller board that is widely used in various projects, especially those where space is a constraint. One of the most commonly used sensors in Arduino projects is the ultrasonic sensor, which can measure distances using sound waves. In this tutorial, we will explore how to interface the Arduino Pro Mini with an ultrasonic sensor and create a simple distance measuring system. Requirements: To follow along with this tutorial, you will need the following components: Arduino Pro Mini board Ultrasonic sensor (HC-SR04 or similar) Jumper wires Breadboard (optional, but recommended) Connect the Arduino Pro Mini The Arduino Pro Mini has a minimal number of pins, so we need to make sure to connect the sensor to the correct pins. Here's how to do it: Connect the VCC pin of the ultrasonic sensor to the VCC pin (5V) of the Arduino Pro Mini. Connect the GND pin of the ultrasonic sensor to the GND pin of the Arduino Pro Mini. Connect the TRIG pi...

Arduino Tutorial: How to Use OLED Display with Arduino

Image
In the world of microcontrollers and DIY electronics, Arduino boards have revolutionized the way we interact with technology. One exciting component that can greatly enhance your Arduino projects is the Organic Light-Emitting Diode (OLED) display. With its vibrant colors and high contrast, an OLED display brings your projects to life, allowing you to showcase information and create engaging user interfaces. In this article, we will explore the steps to successfully integrate an OLED display with an Arduino board and unlock its full potential. Gathering the Required Components To use an OLED display with Arduino, you will need the following components: Arduino board (e.g., Arduino Uno, Arduino Nano) OLED display module compatible with your Arduino Jumper wires for connecting the display to the Arduino Breadboard (optional but recommended for prototyping) USB cable for Arduino board power and programming Connecting the OLED Display To establish the connection between the OLED display and...

Building Own Sun-Tracking Solar Panel Using Arduino

Image
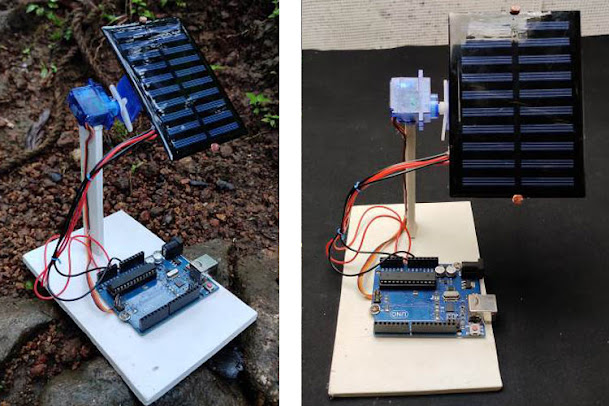
If you're interested in harnessing solar energy to power your home, you might be considering installing solar panels on your roof. However, to get the most out of your panels, you need to ensure that they are pointed directly at the sun throughout the day. This can be accomplished by building a sun-tracking system that automatically adjusts the position of your solar panel based on the movement of the sun.  Project Inspiration : Building your own Sun Tracking Solar Panel using an Arduino In this article, we'll show you how to build a sun-tracking system using an Arduino microcontroller. With this system, your solar panel will always be pointed directly at the sun, maximizing its energy output. The first step in building your sun-tracking system is to gather the necessary components. You'll need an Arduino board, a servo motor, a light sensor, and a few other components that can be easily obtained from an electronics supplier. Once you have your components, you can begin ass...

How DHT22 Temperature and Humidity Sensor Module can be used for Temperature Monitoring Projects?

Image
DHT22 is a temperature and humidity sensor module that can be used to monitor the temperature and humidity levels in various applications. The module consists of a capacitive humidity sensor and a thermistor to measure the temperature. The DHT22 module can be easily interfaced with a microcontroller such as Arduino or Raspberry Pi. The module has a digital output that provides the temperature and humidity readings in a digital format. The data can be accessed using a simple communication protocol, making it easy to use in temperature monitoring projects. One of the most common applications of the DHT22 sensor module is in home automation projects. The module can be used to monitor the temperature and humidity levels inside a room and adjust the temperature and humidity levels accordingly. This can help improve the indoor air quality and create a comfortable living environment. The DHT22 module can also be used in industrial applications such as greenhouses and food storage facilities....

Driver Drowsiness Detection & Alerting System using Arduino

Image
Road accidents became a matter of concern due to the huge increase in traffic. The primary cause of accidents is due to the drowsiness of drivers in the nighttime. Fatigue and drowsiness are some of the leading causes of major accidents on Highways. The only solution to this problem is detecting the drowsiness and alerting the driver. So, in this project, we have thought of building a Driver Drowsiness Detection and Alerting System for Drivers using Arduino Nano, Eye blink Sensor, and RF Transceiver module. The basic purpose of this system is to track the driver’s eye movements using Eye blink Sensor and if the driver is feeling drowsy, then the system will trigger a warning message using a loud buzzer alert. Materials Required for Building a Drowsiness DetectorArduino Nano Eyeblink Sensor RF Transceiver Module HD12E & HD12D IC Buzzer 9V Battery 12V DC power supply Driver Drowsiness Detector Circuit Diagram Driver Drowsiness Detector consists of RF Transmitter and Receiver section....
Image
 What do you know about NRF24L01 module? The NRF24L01 module is a low-cost, low-power, 2.4GHz transceiver module that is commonly used for wireless communication between microcontrollers, computers, or other similar devices. It was developed by Nordic Semiconductor and is widely used for applications such as home automation, remote control systems, and robotics. The NRF24L01 module operates in the 2.4GHz ISM (Industrial, Scientific, and Medical) band and has a data rate of up to 2 Mbps. It supports a number of data transmission modes, including shockburst, which allows for fast and efficient data transfer. The module has a range of up to 100 meters in open air and can be easily integrated with microcontrollers such as the Arduino and Raspberry Pi. One of the key advantages of the NRF24L01 module is its low power consumption, making it ideal for battery-powered applications. The module can be powered from 1.9V to 3.6V and has a power consumption of just a few milliamps during operat...

Arduino Bluetooth Speaker with Reactive NeoPixel LEDs

Image
How much passion do you have for music? If a lot of then definitely you have a speaker or Bluetooth speaker. You want to be cool in front of your friends when you are showing your speaker to them. So, for the DIY speaker, we have an amazing Arduino based Bluetooth Speaker. Bluetooth speaker has now become a pretty popular household gadget that we use on a daily basis. So, for today's article, we thought to design and build our own Bluetooth Speaker. To make things a little more interesting, we have added a strip of WS2812B Neo Pixel RGB LEDs that will be used to visualize the music. In order to make the visualization more responsive, we have used colorchord - sound to light conversion tool that is developed by one of my favourite youtubers cnlohr. Just Check out the complete article here

How to do Digital-to-Analog conversion with Arduino - Arduino DAC Tutorial

Image
We know that Arduino has ADC (Analog-to-Digital Converter) feature but what if we want Digital-to-Analog Conversion with Arduino. We have the hack for this. We will connect an MCP4725 DAC IC with Arduino Uno and provide analog input value to Arduino pin A0 by using a potentiometer. Then ADC will be used to convert the analog value into digital form. After that those digital values are sent to MCP4725 via the I2C bus to be converted into analog signals using the DAC MCP4725 IC. Arduino pin A1 is used to check the analog output of MCP4725 from the pin OUT and finally display both ADC & DAC values and voltages in the 16x2 LCD display . For this, you need circuit diagram and Arduino code; You can check out this Arduino ADC Tutorial , here you can find circuit, code, and a step-by-step guide for Digital-to-Analog Conversion with Arduino. You can also check out the demonstration video below:

DIY Automatic Medicine Reminder Using Arduino

Image
Today I am sharing a project that can help people to remind them to take their medicine on time. This project is based on Arduino UNO. This Medicine Reminder can be used in hospitals, for doctors, or for patients at home. You can program it according to your needs like you want to get notified by call, message, mail, or alarm. This project is taken from Circuit Digest and is easy to make. DIY Arduino Medicine Reminder using Arduino  Check out the project here...

DIY Arduino Based CNC Plotter Machine

Image
  Today we are going to make a CNC Plotting Machine with Arduino. CNC – Computer Numerical Control – Taking digitized data, a computer and CAM program is used to control, automate, and monitor the movements of a machine. The machine can be a milling machine, lathe, router, welder, grinder, laser or waterjet cutter, sheet metal stamping machine, robot, or many other types of machines. This is a little complex project but this is the simplest way of making a CNC Plotting Machine. This CNC Plotting Machine can make designs, cartoons, texts, and shapes as the user defines. Don't forget to subscribe and ask if you have any doubt in the comment section. DIY Arduino Based CNC Plotter Machine

Getting Started with STM32 (Blue Pill) using Arduino IDE: Blinking LED

Image
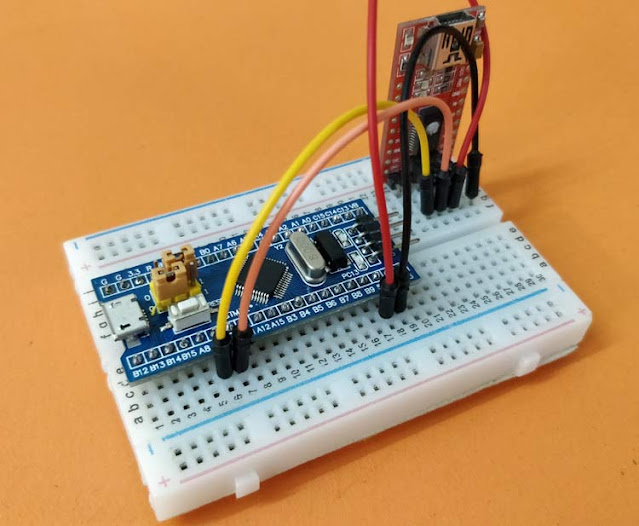
Today we will learn about a new board STM32 also known as Blue Pill. STM32 is a family of 32-bit microcontroller integrated circuits by STMicroelectronics. The STM32 chips are grouped into related series that are based around the same 32-bit ARM processor core, such as the Cortex-M33F, Cortex-M7F, Cortex-M4F, Cortex-M3, Cortex-M0+, or Cortex-M0. The reason you are using this board is that the Arduino Board has an 8bit CPU and ARM Cortex M3 Structure. You can program this with your old Arduino Board. Getting Started with STM32 (Blue Pill) using Arduino IDE: Blinking LED

DIY Build a Laser with Arduino

Image
  Hey Guys, Today I bring you an amazing project from Hackster . This will be an Arduino Project. You must be familiar with laser light, today you will be learning that how you can make your own simple Laser with Arduino. This is a simple, short, and fully beginner-level Project. You will enjoy making this project.  If you complete this project, share a video of the project and if you encounter any problem while making the project please ask it down in the comment section. DIY Simple Laser With Arduino

DIY Line Follower Robot using Arduino

Image
  Today's Project is for Robotics Beginners who want to start building their own robots. This is not the most basic robot but a beginner can make this easily. This project is taken from CicuitDigest which also have some more interesting robotics projects you can try: Line Follower Robot using 8051 Microcontroller  Line Follower Robot using Raspberry Pi Texas MSP430 Launchpad based Line Follower Simple Line Follower using PIC Microcontroller Line Follower using ATmega16 AVR Microcontroller The tutorial contains all the necessary explanations, codes, and components required to complete the project. I hope you will find the project interesting and easy to build and if you get stuck anywhere during the project ask in the comment section. Check out the video of this Project before heading to the  tutorial Page... DIY Line following Robot using Arduino

Bluetooth Controlled Servo Motor using Arduino

Image
A servo motor is a type of motor that can rotate with great precision. Normally this type of motor consists of a control circuit that provides feedback on the current position of the motor shaft, this feedback allows the servo motors to rotate with great precision. We are using a servo motor here for more accurate control. You will learn how to use a servomotor wirelessly with an Arduino UNO and an Android device via Bluetooth connection. All the required codes and tips are provided in the tutorial and if you want to ask something please comment it down. Bluetooth controlled servo motor using Arduino Check out how the Project works through this video...

Automate your Home with Arduino Nano using Smartphone and Bluetooth

Image
Most of the things in the world are getting automated. People are getting to see automation in every small thing which they can't even imagine. The most popular part where we are seeing most of the automation part being done is in our homes. Home automation makes people's life easier. You just have to control your devices sitting in one place in your home. The home automation system can be expensive for some, so I am sharing this DIY Project with you all from Instructables which will tell you how to make your home automated with the help of Arduino Nano board, Bluetooth module, and some other supplies. The system will use your smartphone Bluetooth to connect and you just have to connect your smartphone Bluetooth with the devices and then you can access your home appliances with your smartphone. This automation system has also got manual control so that if you have some trouble logging in with your phone you can control your devices manually too. So, if you got the whole idea o...